2.1.1. Workspace
Upon opening Blender, the splash screen gives you the possibility to create a Video Editing project. Choosing this option takes you immediately into the Video Editing workspace. This workspace is a smart combination of five editors: File Browser (top left), Video Sequencer: Preview (top middle), Properties (top right), Video Sequencer: Sequencer (near bottom) and Timeline (bottom). Together they provide you with all the necessary tools to edit your videos.
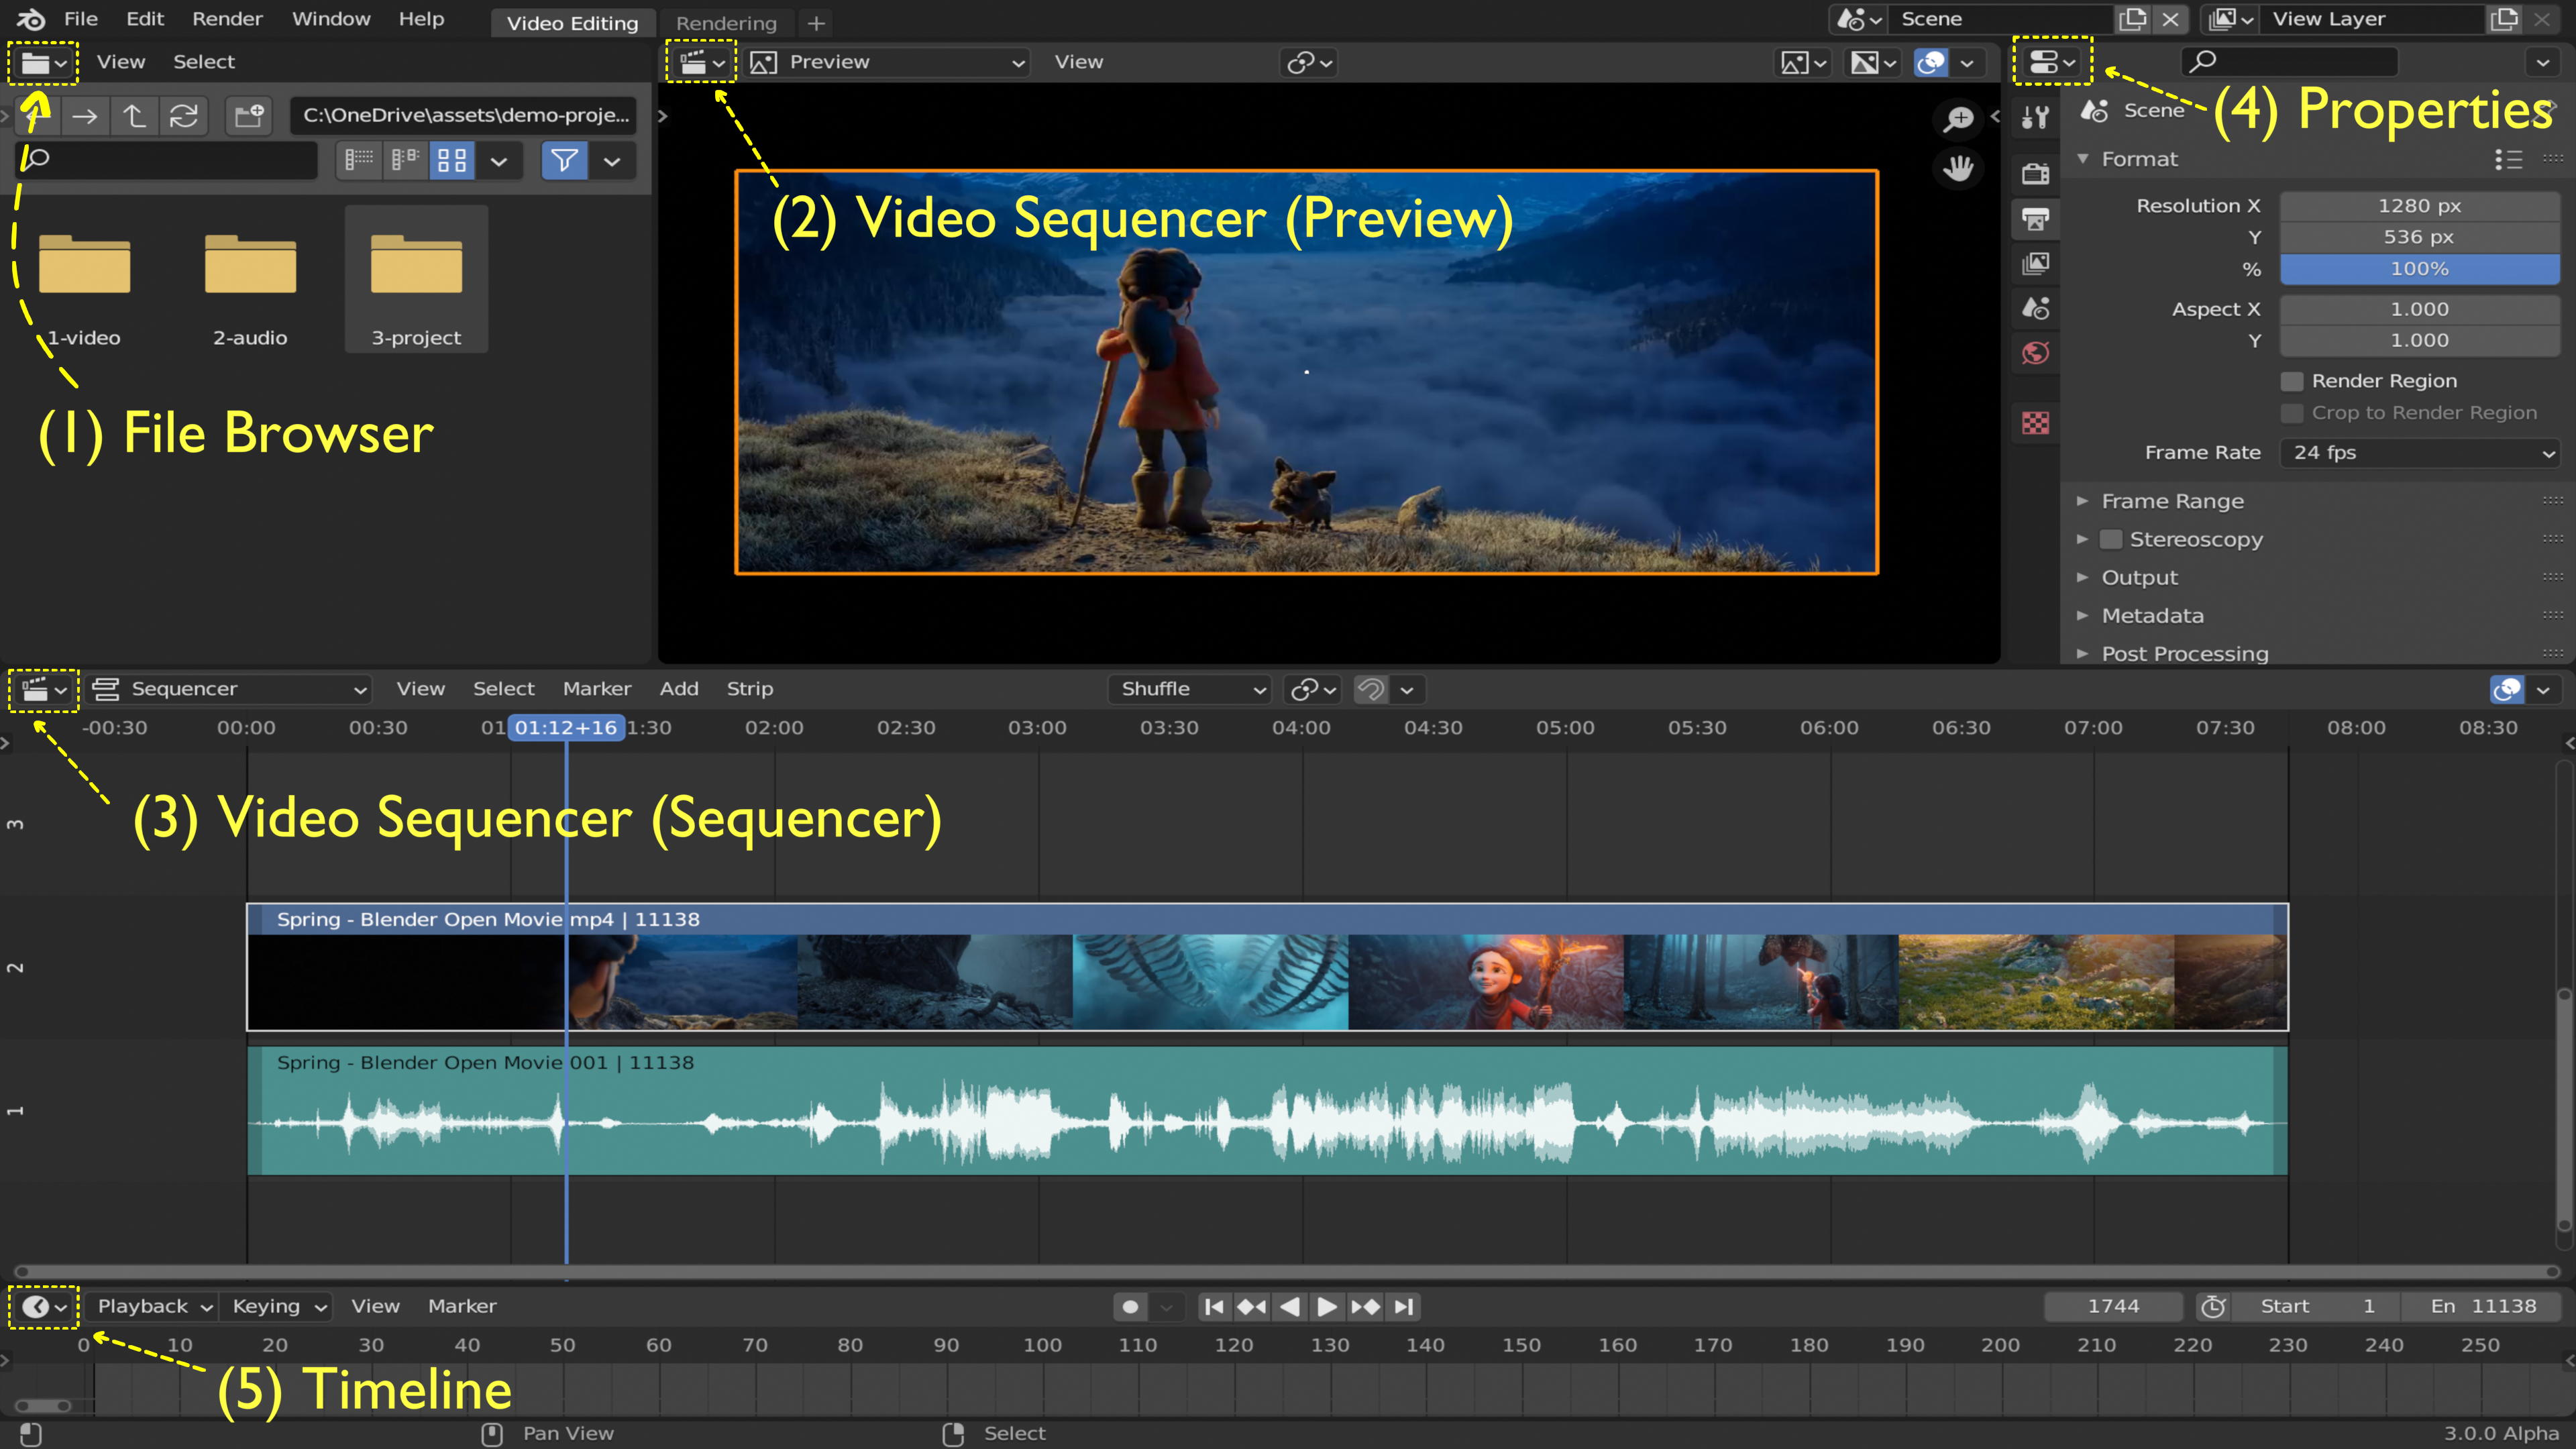
Figure 1: screenshot of the video editing workspace
As a result of your preparation for this video editing project, all of your assets (clips, images, sounds, …) are organized in folder structure that is appropriate for your project. For example, they are organized on daily basis, per topic, per character, … You can use the File Browser for displaying this structure and for easily adding assets to your timeline by dragging and dropping files. If you select multiple files, they will added one after the other to the timeline. You can customize (sorting, filtering, …) the file browser, so that you have an optimal overview of your assets.
The Sequence Editor has three view types: Sequencer, Preview, and Sequencer & Preview (see Video Sequence Editor for more information.
It is possible to create multiple instances of any view type in single workspace; so, the Video Sequencer occupy two areas in the workspace. You can switch easily between the Sequencer and the Preview with the CtrL Tab.
The Properties panel allows editing of many active data. They are organized into several categories, which can be chosen via tabs (the icons column to its left). Not all categories are relevant in the Video Sequencer. By default only the following are shown: Active Tool, Render Properties, View Layer Properties, Scene Properties, World Properties, and Texture Properties. Most of the time, you will use only the Render Properties.
The built-in Video Editing workspace is very handy and it can be customized easily. Each editor area can be sized, moved, replaced or removed from the workspace. As example, an alternative workspace with auto-installed add-ons can be download from tin2tin’s github. A screenshot is provided below.
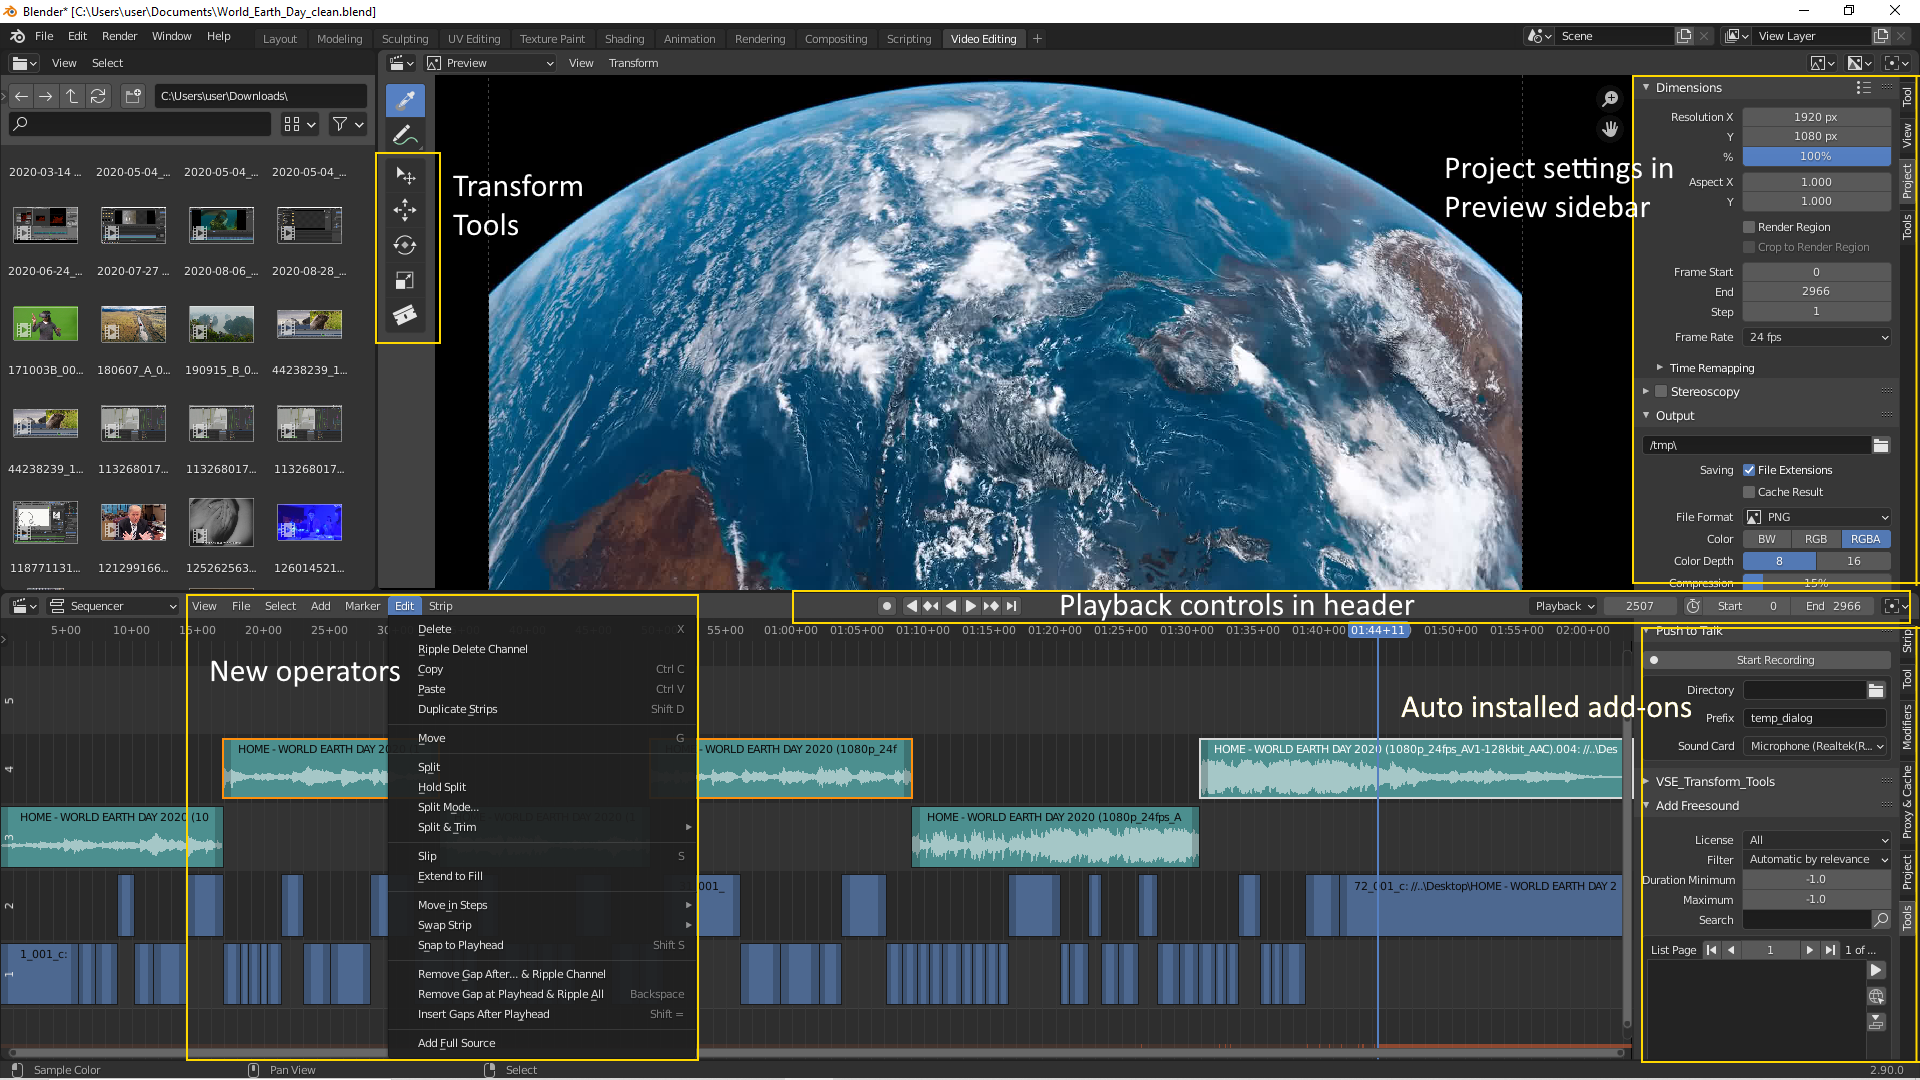
Figure 2: a customized Video Editing Workspace.
Please, note that the Timeline editor is removed and that the Playback controls are placed in the header of the Sequencer. Several add-ons are automatically installed (e.g. Transform tools), together with some new operators (e.g. Remove Gap after …). Last but not least, the Properties editor is also removed and the project settings are placed in the Preview sidebar, where they can easily toggled on/off with the N-key.