2.2.2.2. Annotation with Grease Pencil
To create a Grease Pencil annotation over your footage in the Video Sequence Editor, you need two scenes; one for the Grease Pencil annotation and one for the Video Sequencer. You cannot create the Grease Pencil annotation within the same same scene that contains the video footage. Let’s call them GP-scene and VSE-scene. You probably have already the VSE-scene you’re working on. The GP-scene can be a Copy Settings of the VSE-scene. This will make the framerate and resolution of both scenes the same; not a requirement though. A camera however is not copied and should be added manually to the GP-scene. Then, add the GP-scene as a scene strip in the VSE-scene (menu Add > Scene) on top of the already existing footage. Of course, because the annotation hasn’t been created yet, nothing will appear in the preview.
Switch to the GP-scene and open the 2D Animation workspace (see figure 1). Add a new camera. You can add the the to-be-annotated movie as a background of the camera. Select the camera in the Properties panel and search for the panel Background images. Another option is to add the movie as a texture on a plane. This can be easily done with the add-on Images as planes.
You also have to make the canvas background transparent. Otherwise, the background of the GP-scene will completely cover the VSE-scene strip. Switch to the Render Properties in the Properties panel and set the Film property of the GP-scene to Transparent. Put the Current Frame indicator or playhead at frame 1 and add a Grease Pencil object (menu Add > Grease Pencil > Blank). Switch to the Draw mode in Grease Pencil and draw something on the canvas.
Figure 1 shows the 2D Animation workspace in Draw Mode. A yellow box and arrow is drawn on the canvas. Note that the yellow box is keyframed at frame 1 and the arrow at frame 20. Both are visible in the 2D Animation workspace because the current frame is at location 20.

Figure 1: 2D Animation workspace with Grease Pencil object and background image
Switch back to the VSE-scene and to the Video Editing workspace and look for the result. Make sure that Rendered Shading in the View panel of the Properties of the Preview is switched on. You will see the GP drawing on top of the underlying movie.
Although the Video Editing workspace contains a camera by default, it is not necessary to have one. The Video Sequencer creates its own output based on the added strips.
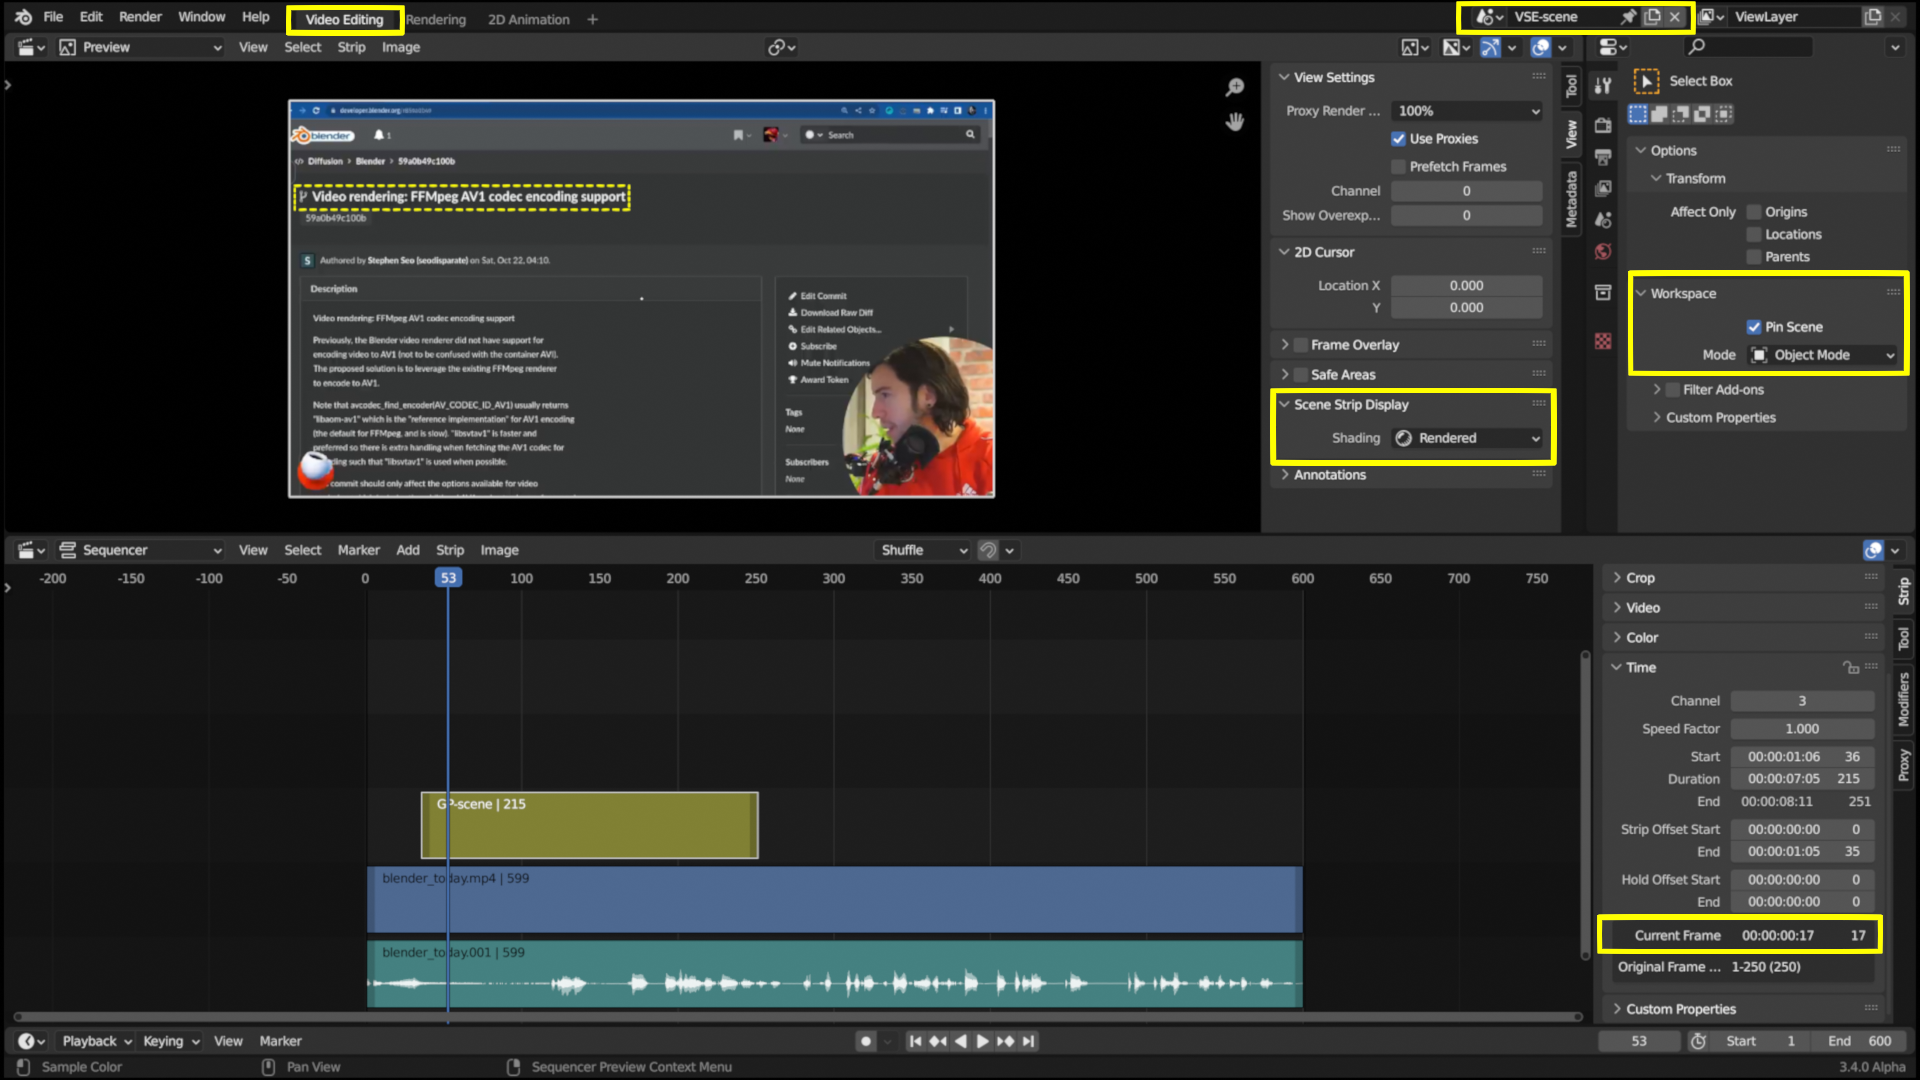
Figure 2: Video Editing workspace with (cutted) Scene strip added
As you can see in the Sequencer, the GP-scene is added at about frame 50. The current frame for the scene strip however is frame 17. So, only the yellow box is displayed. From frame 20 on, the arrow will appear.
The technique from above only works if you haven’t haven’t edited the original clip. But, if you have, for example, applied a transformation (e.g. rotation, scale) on the original footage, this technique won’t work. Then you need to render out first the edited strip and insert this output into the GP-scene.
Multiple annotations
Most of the time, you need more than one annotation in your video project. The workflow becomes then of course a little more complex. You can choose between a few alternatives.
You can create one scene for each animation that you need and each animation is then repesented by one scene strip.
It is also possible to encapsulate several animations within one scene. If the animation is however rather complex, a separate scene is adviseable.
Separate each animation based on a time frame, for example the first animation starts at frame 1, the second at frame 500, the third at frame 1000, …. The scene strip should then be cut (shortcut K or Shft-K) at the correct frames.
You can also create a different layer for each animation (in the Layers panel of the Grease Pencil property) and keyframe the Set Layer Visibility property (Eye icon in the Layers panel) appropriately. In the example from above, set all Layers invisible at frame 0, and set them visible at respectively frame 1, 500 and 1000.
You can reserve a separate Grease Pencil object for each animation. Then you also have to set the Render visibility appropriately.